Pro Tips for Carving the Ultimate Pumpkin This Halloween
It’s that time of year and I’ve decided to share my top tips for carving the ultimate pumpkin this Halloween!

1. Choosing the right pumpkin
So you’ve made it to the pumpkin patch and it’s time to decide on the perfect pumpkin to take home. If you already know what you want to carve, selecting the right pumpkin can be easier. If you’re carving a face, selecting a taller, more oval pumpkin can create the right portrait frame. If you’re carving more of a scene or landscape, go for a squatter, more circular pumpkin. I like a medium-sized pumpkin that’s manageable and can accommodate a pattern or drawing about the size of a piece of paper. Choose one with a nice stem and as few blemishes as you can. If one side of the pumpkin is flat or deformed, make sure there is a large enough, in tact surface for your carving and put the blemishes in the back. If you’re late to the patch and only the deformed pumpkins are left, get creative and use it to your advantage. Sometimes the right blemish or dent can actually be used to accent your carving, like create a scar or cool effect.

2. Selecting your tools

This is essential. I prefer to use the smallest saw I can find because I tend to do a lot of heavy detail work. I find I can use the small saws for larger cut outs as well without too much extra work. This allows me to make detailed angles and effects. Its rare that you can find a small enough saw from your average grocery store pumpkin kit, so search online for master or expert kits that come with smaller saws. Also consider whether your design might be better served by using a shaving or scraping tool, as opposed to a full cut out. Scraping and shaving is a great way of adding detail and depth, if you shave the outer orange layer of the pumpkin skin off than the light inside your pumpkin can still shine through but not as brightly as if you fully carve the piece out.
3. Prepping your pumpkin
I always clean and dry my pumpkin before I begin. I use a medium sized saw to cut my whole in the top of the pumpkin. Be careful to cut a large enough top but not too large. If your hole is too small and you try and widen it, then your top won’t fit on anymore. Carving the top is the only time I suggest cutting your pumpkin at an angle. Instead of slicing straight down with your tool at 90 degrees to the surface, angle your blade a bit lower so that the top will have a nice ledge to sit on and won’t fall through as the pumpkin ages and dries out a bit. Next the messy part, you gotta scoop out the guts. I often use a simple metal spoon and do my best to shave a bit of the sides down as I’m removing the insides. I prefer a slightly thinner carving surface, so the easiest way to do this is shave down the inside. You can concentrate on just the face of the pumpkin that will be used for your carving.
4. Should I use a pattern or free-draw?
This is definitely a personal preference, but if you are new to carving, I highly recommend using a pattern. There are so many available online or from the store booklets. If you choose to free-draw your design, I still recommend drawing it onto a piece of paper and transferring it to your pumpkin. It’s often difficult to draw directly on a pumpkin and things can become distorted due to the imperfect surface. Use your artistic skills on paper and then transfer it to your pumpkin for best results.
5. Selecting the right pattern

THE WRONG CHOICE. This is a common problem with stencils/patterns online. If you carve out the dark areas as this pattern seems to indicate you should, then when lit, those areas will be light and the pumpkin design won’t look right. This is the wrong type of pattern to use or would need to be modified, so that the shadow/dark areas are NOT carved out.
Choose a pattern that’s right for your skill level and also take a close look that the design is appropriate for carving. There are two common pitfalls when it comes to pumpkin patters. 1) Some online patterns have you carving out the wrong sections of light vs. shadow. Let me explain, whatever you carve out of the pumpkin will eventually be the lighter areas of your design and whatever is left behind will be the darker areas. Some designs instruct you to carve out the shadows and when lit, your pumpkin will not look like your pattern at all. Make sure that you are carving out the areas of the design that are meant to be lit. 2) If it’s not connected, it will not hold. Make sure that all parts of the pattern that are meant to stay are connected to each other so your pumpkin will hold in one piece and you’re not carving your design off the pumpkin. If the pattern doesn’t look like it meets these criteria, either select a new one, or draw over it to correct any issues.
6. Transferring Tips
Take your piece of paper with the pattern or drawing on it and cut a slit into each of the corners. This will all you to tape your flat drawing onto the curved surface of the pumpkin without as many gaps. Use a poking tool or tip of a pen/pencil to transfer your pattern onto your pumpkin. Make sure you space your pokes close enough together that you can recognize your design once the paper is removed and keep it nearby for reference. Sometimes for more complicated designs, I use a pencil to connect the dots so I can see the design more clearly when carving.
7. Carving Tips

Using your smallest saw, start with the smaller details at the center of your design. As you carve your pumpkin, it loses strength and if you leave the small, detailed areas until the end then it will be difficult not to damage the pumpkin during the carving process. It can also be helpful to start from the center of the design and carve outwards, the edges connected to the rest of the pumpkin should be the strongest and most stable surfaces, so save these for last. Larger sections can be broken down into 2 or 3 sections for removal. Keep your saw at a 90 degree angle to the surface of your pumpkin at all times. After you finish carving a section, push the piece into the center of the pumpkin. If it’s not sliding into the pumpkin easily, go over the section again with the saw, keeping sure your saw is still at 90 degrees. Once the section is carved, examine the edges to make sure there are no pieces or pumpkin strings hanging down and clean around the edges if needed.
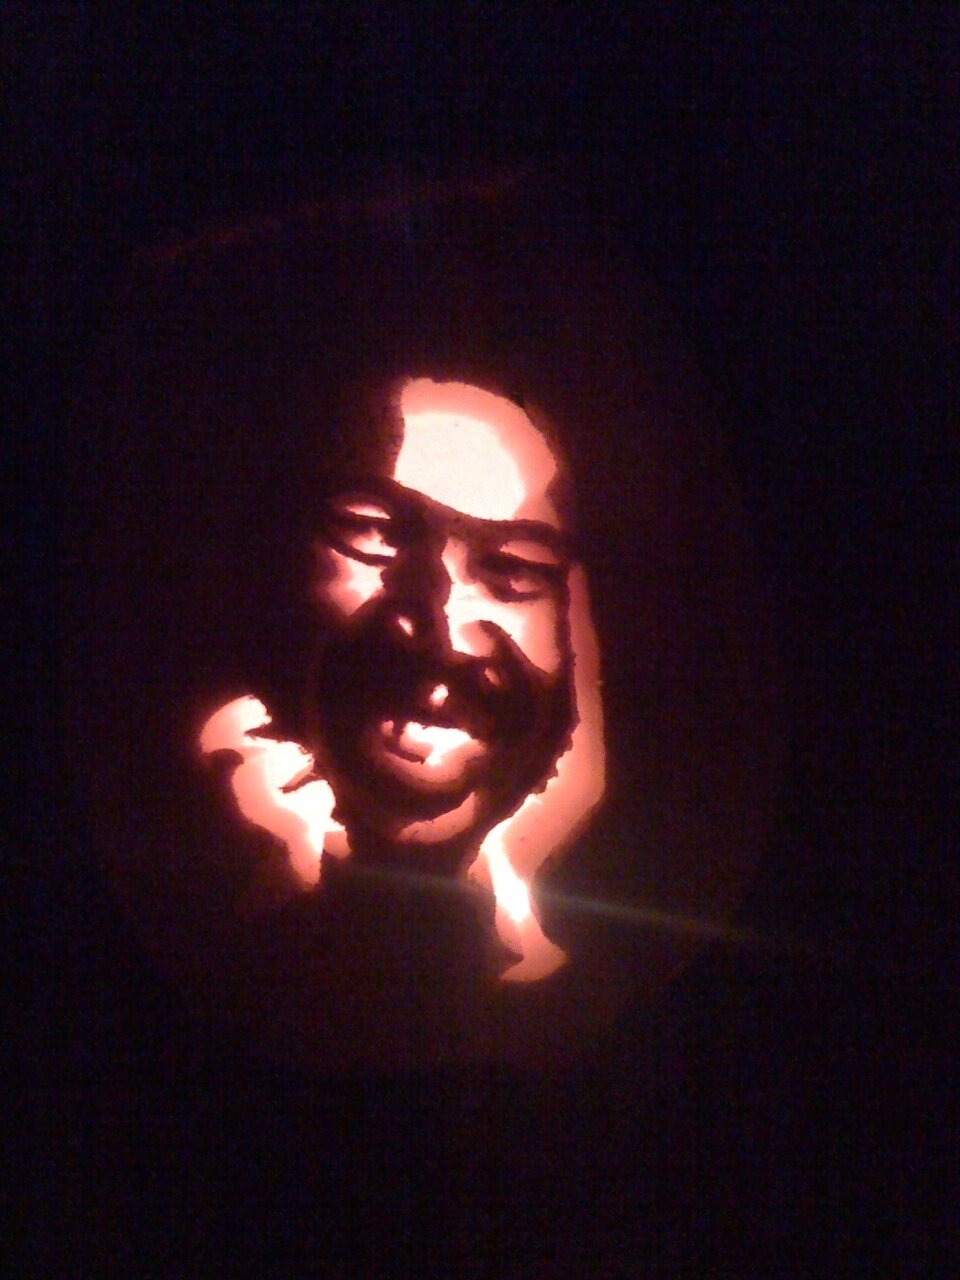
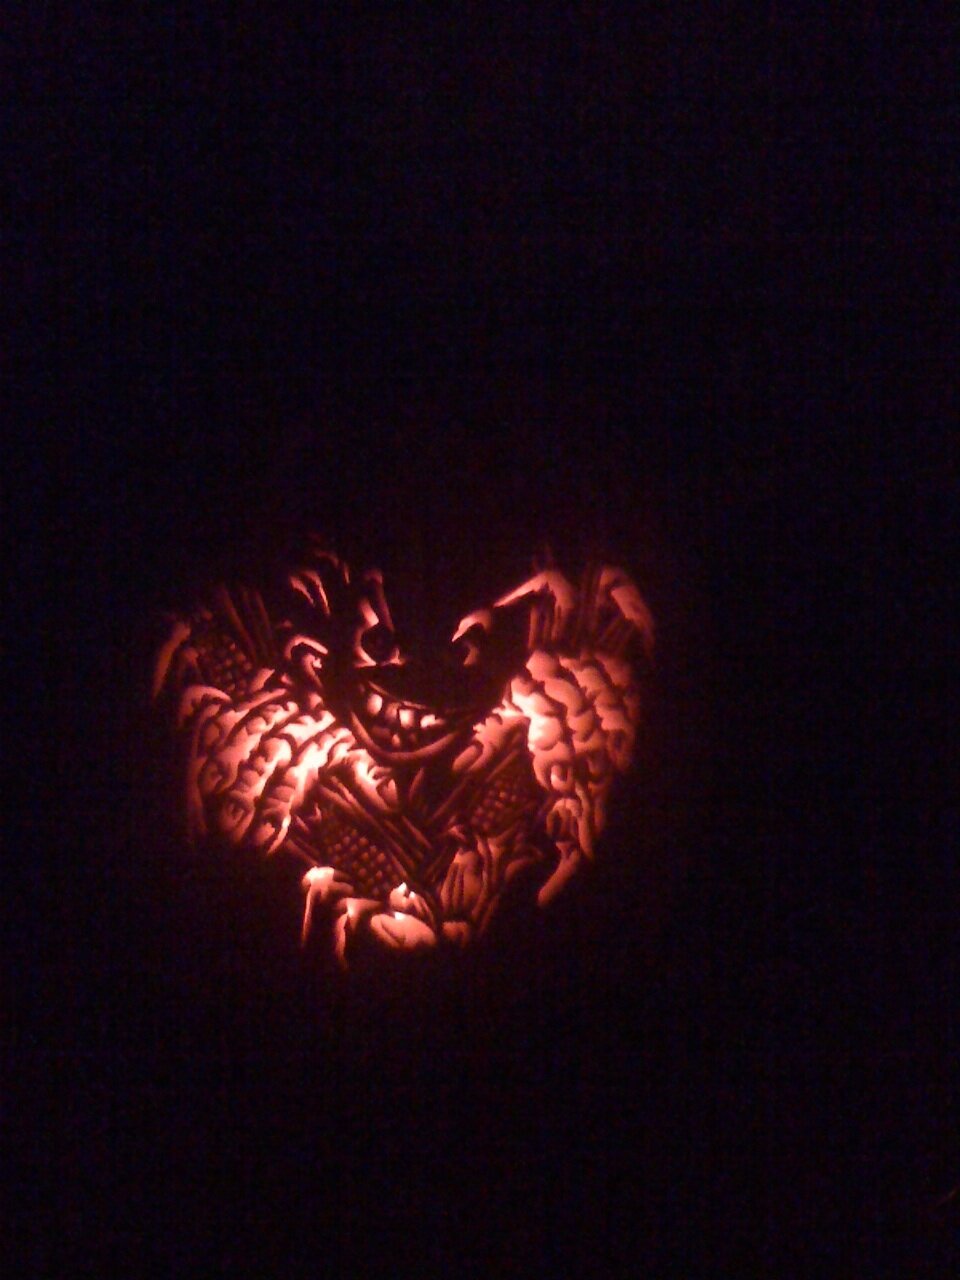
8. Touch ups & Display
Finally, light a small tea light in the center of your pumpkin and place the top on. Turn off all the lights or take the pumpkin outside on a dark evening. Examine the design and see if any areas need to be carved out slightly to allow more light through or any edges cleaned up a bit.